Auto-implementation
For certain recommendation types, AdAdvisor can apply the change directly to your Meta ad account through the API. This is the fastest way to act on budget and status changes.Which recommendations support auto-implementation?
| Action | Auto-implement available? |
|---|---|
| Scale Up (budget increase) | Yes |
| Scale Down (budget decrease) | Yes |
| Pause entity | Yes |
| Shutdown campaign | Yes |
| Resume entity | Yes |
| Duplicate campaign | Yes |
| Refresh Creatives | No (requires creative assets) |
| Fix Audience Fatigue | No (requires targeting changes) |
| Create Campaign/Ad Set | No (requires manual setup) |
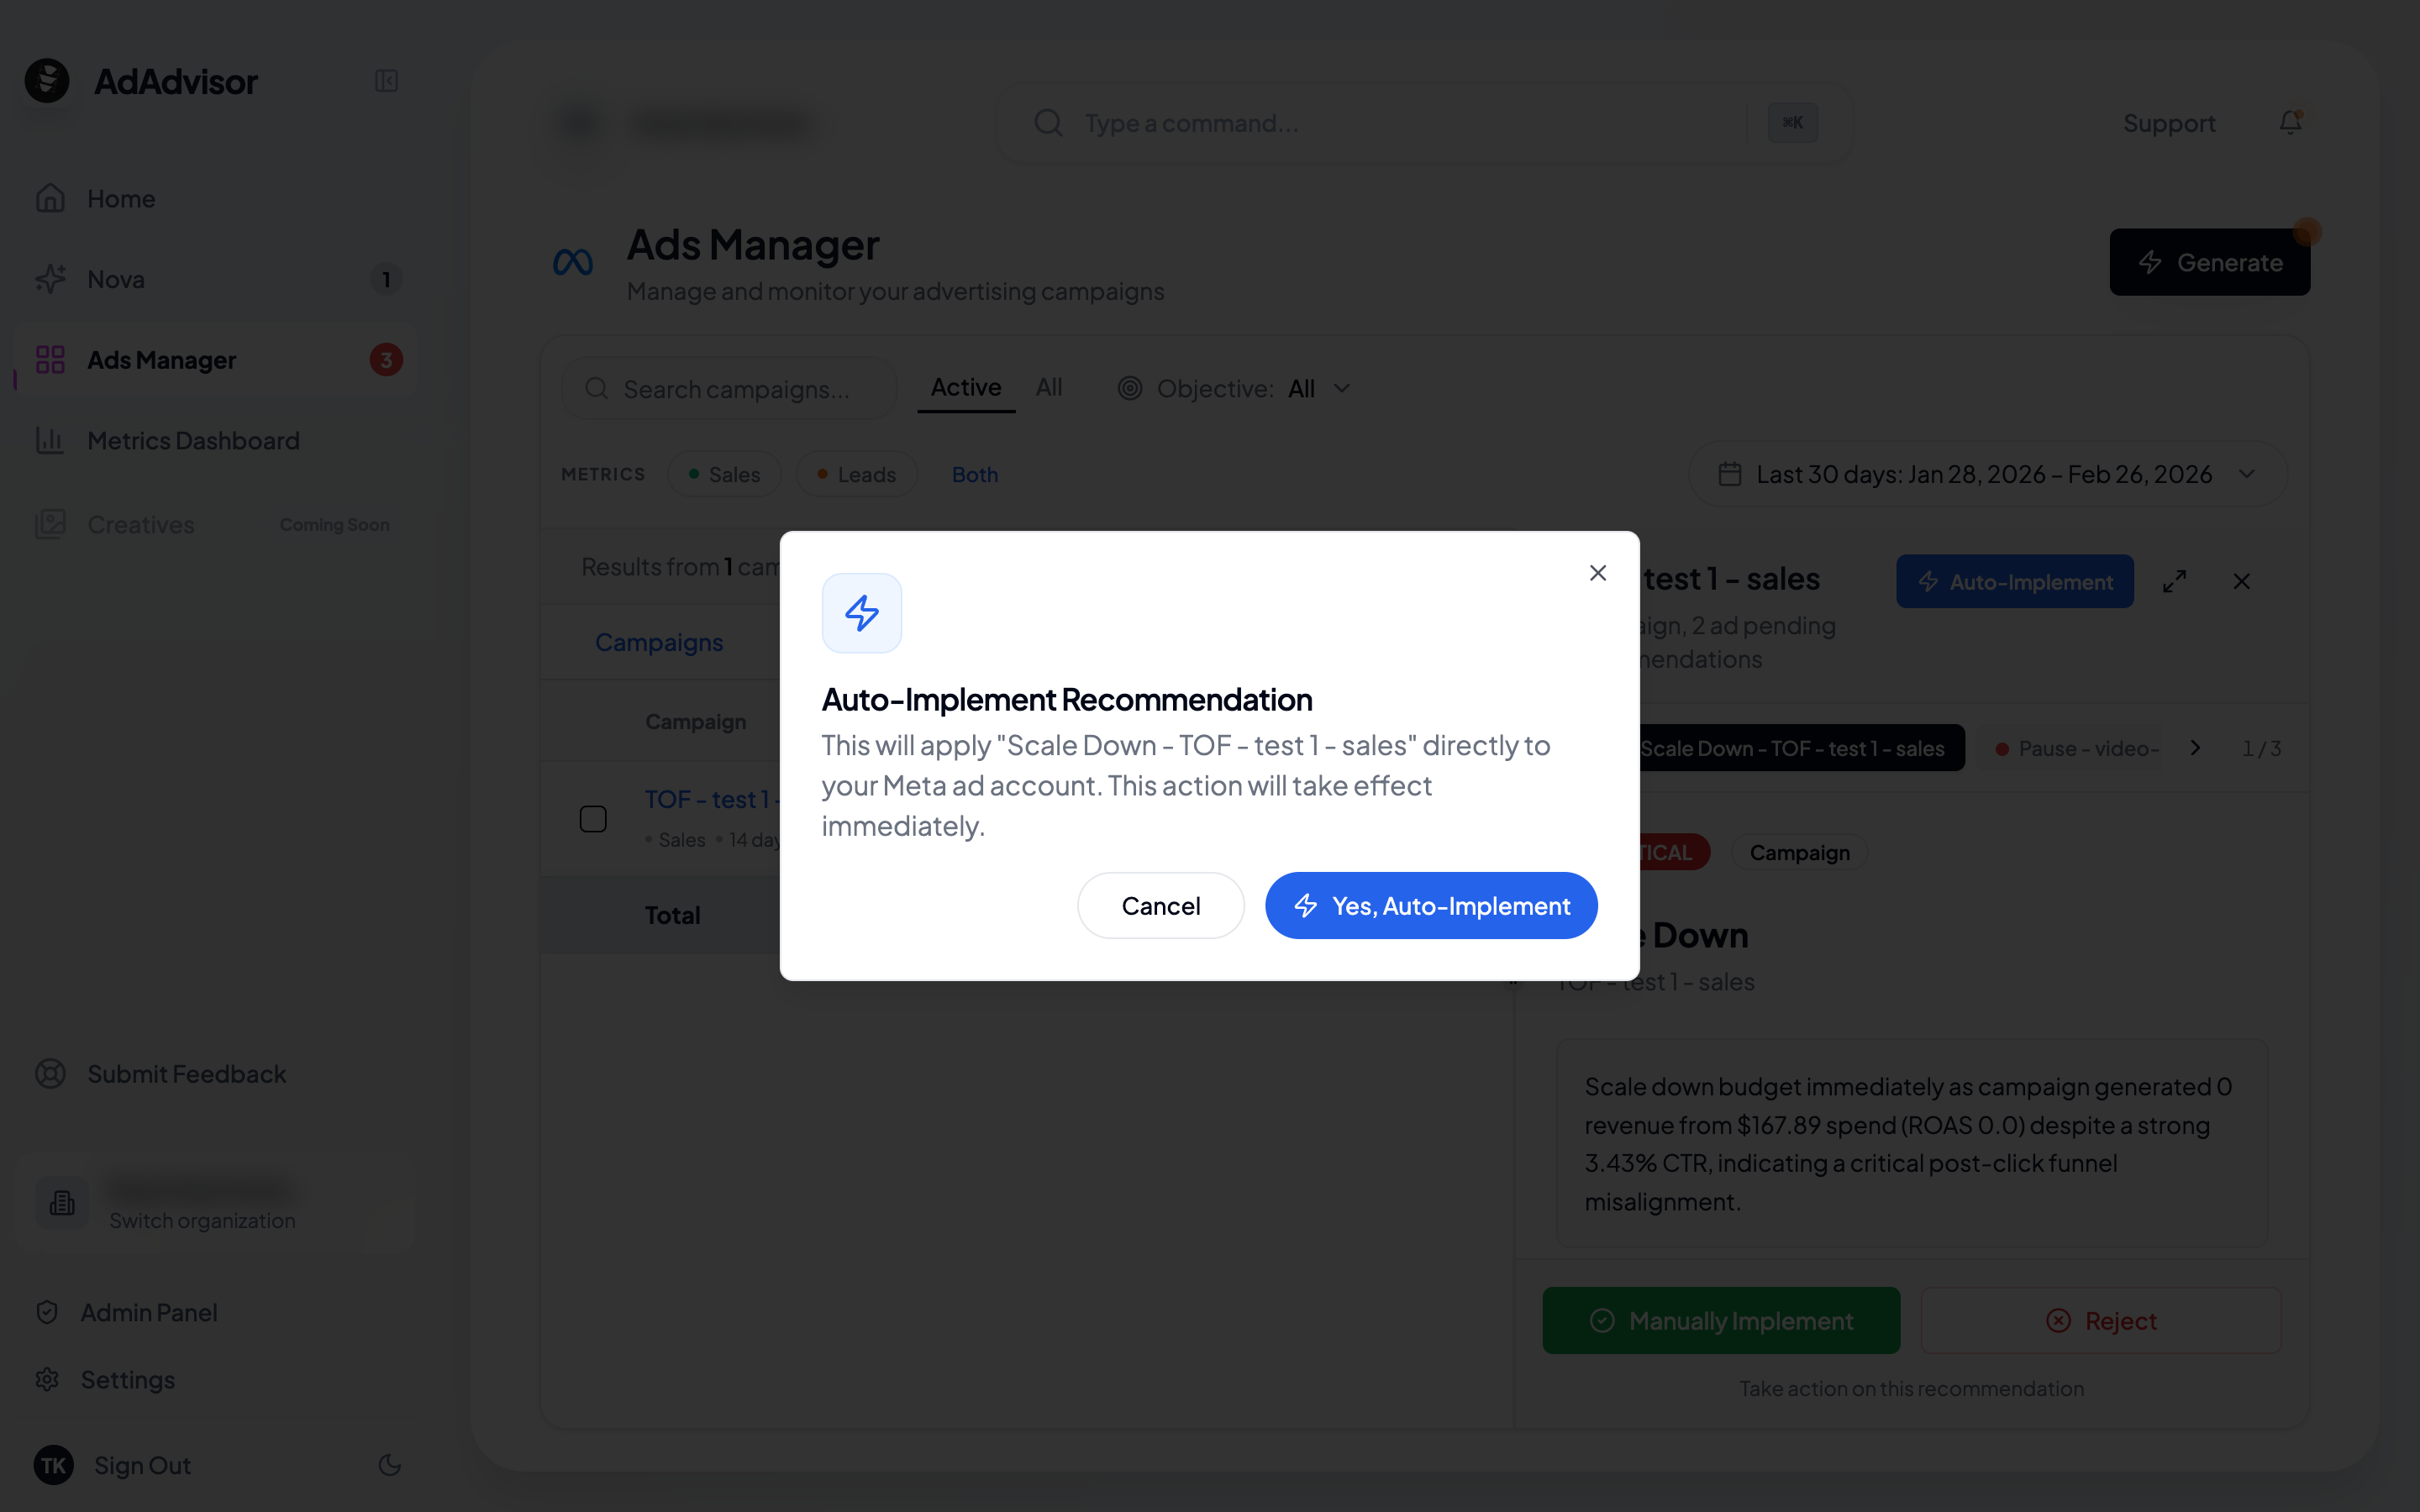
How to auto-implement
Click 'Auto-Implement'
On an eligible recommendation, click the Auto-Implement button. This button only appears for supported action types.
Review the confirmation dialog
A dialog shows exactly what will change. For example: “This will increase the daily budget for campaign ‘Summer Sale’ from 75.”
What happens behind the scenes
When you auto-implement:- AdAdvisor calls the Meta Ads API with the specific change
- A background task is created and tracked
- The app polls for completion (you’ll see the progress)
- On success, the recommendation is marked as “Accepted” with a timestamp
- If something fails, you’ll see an error message and can try again or implement manually
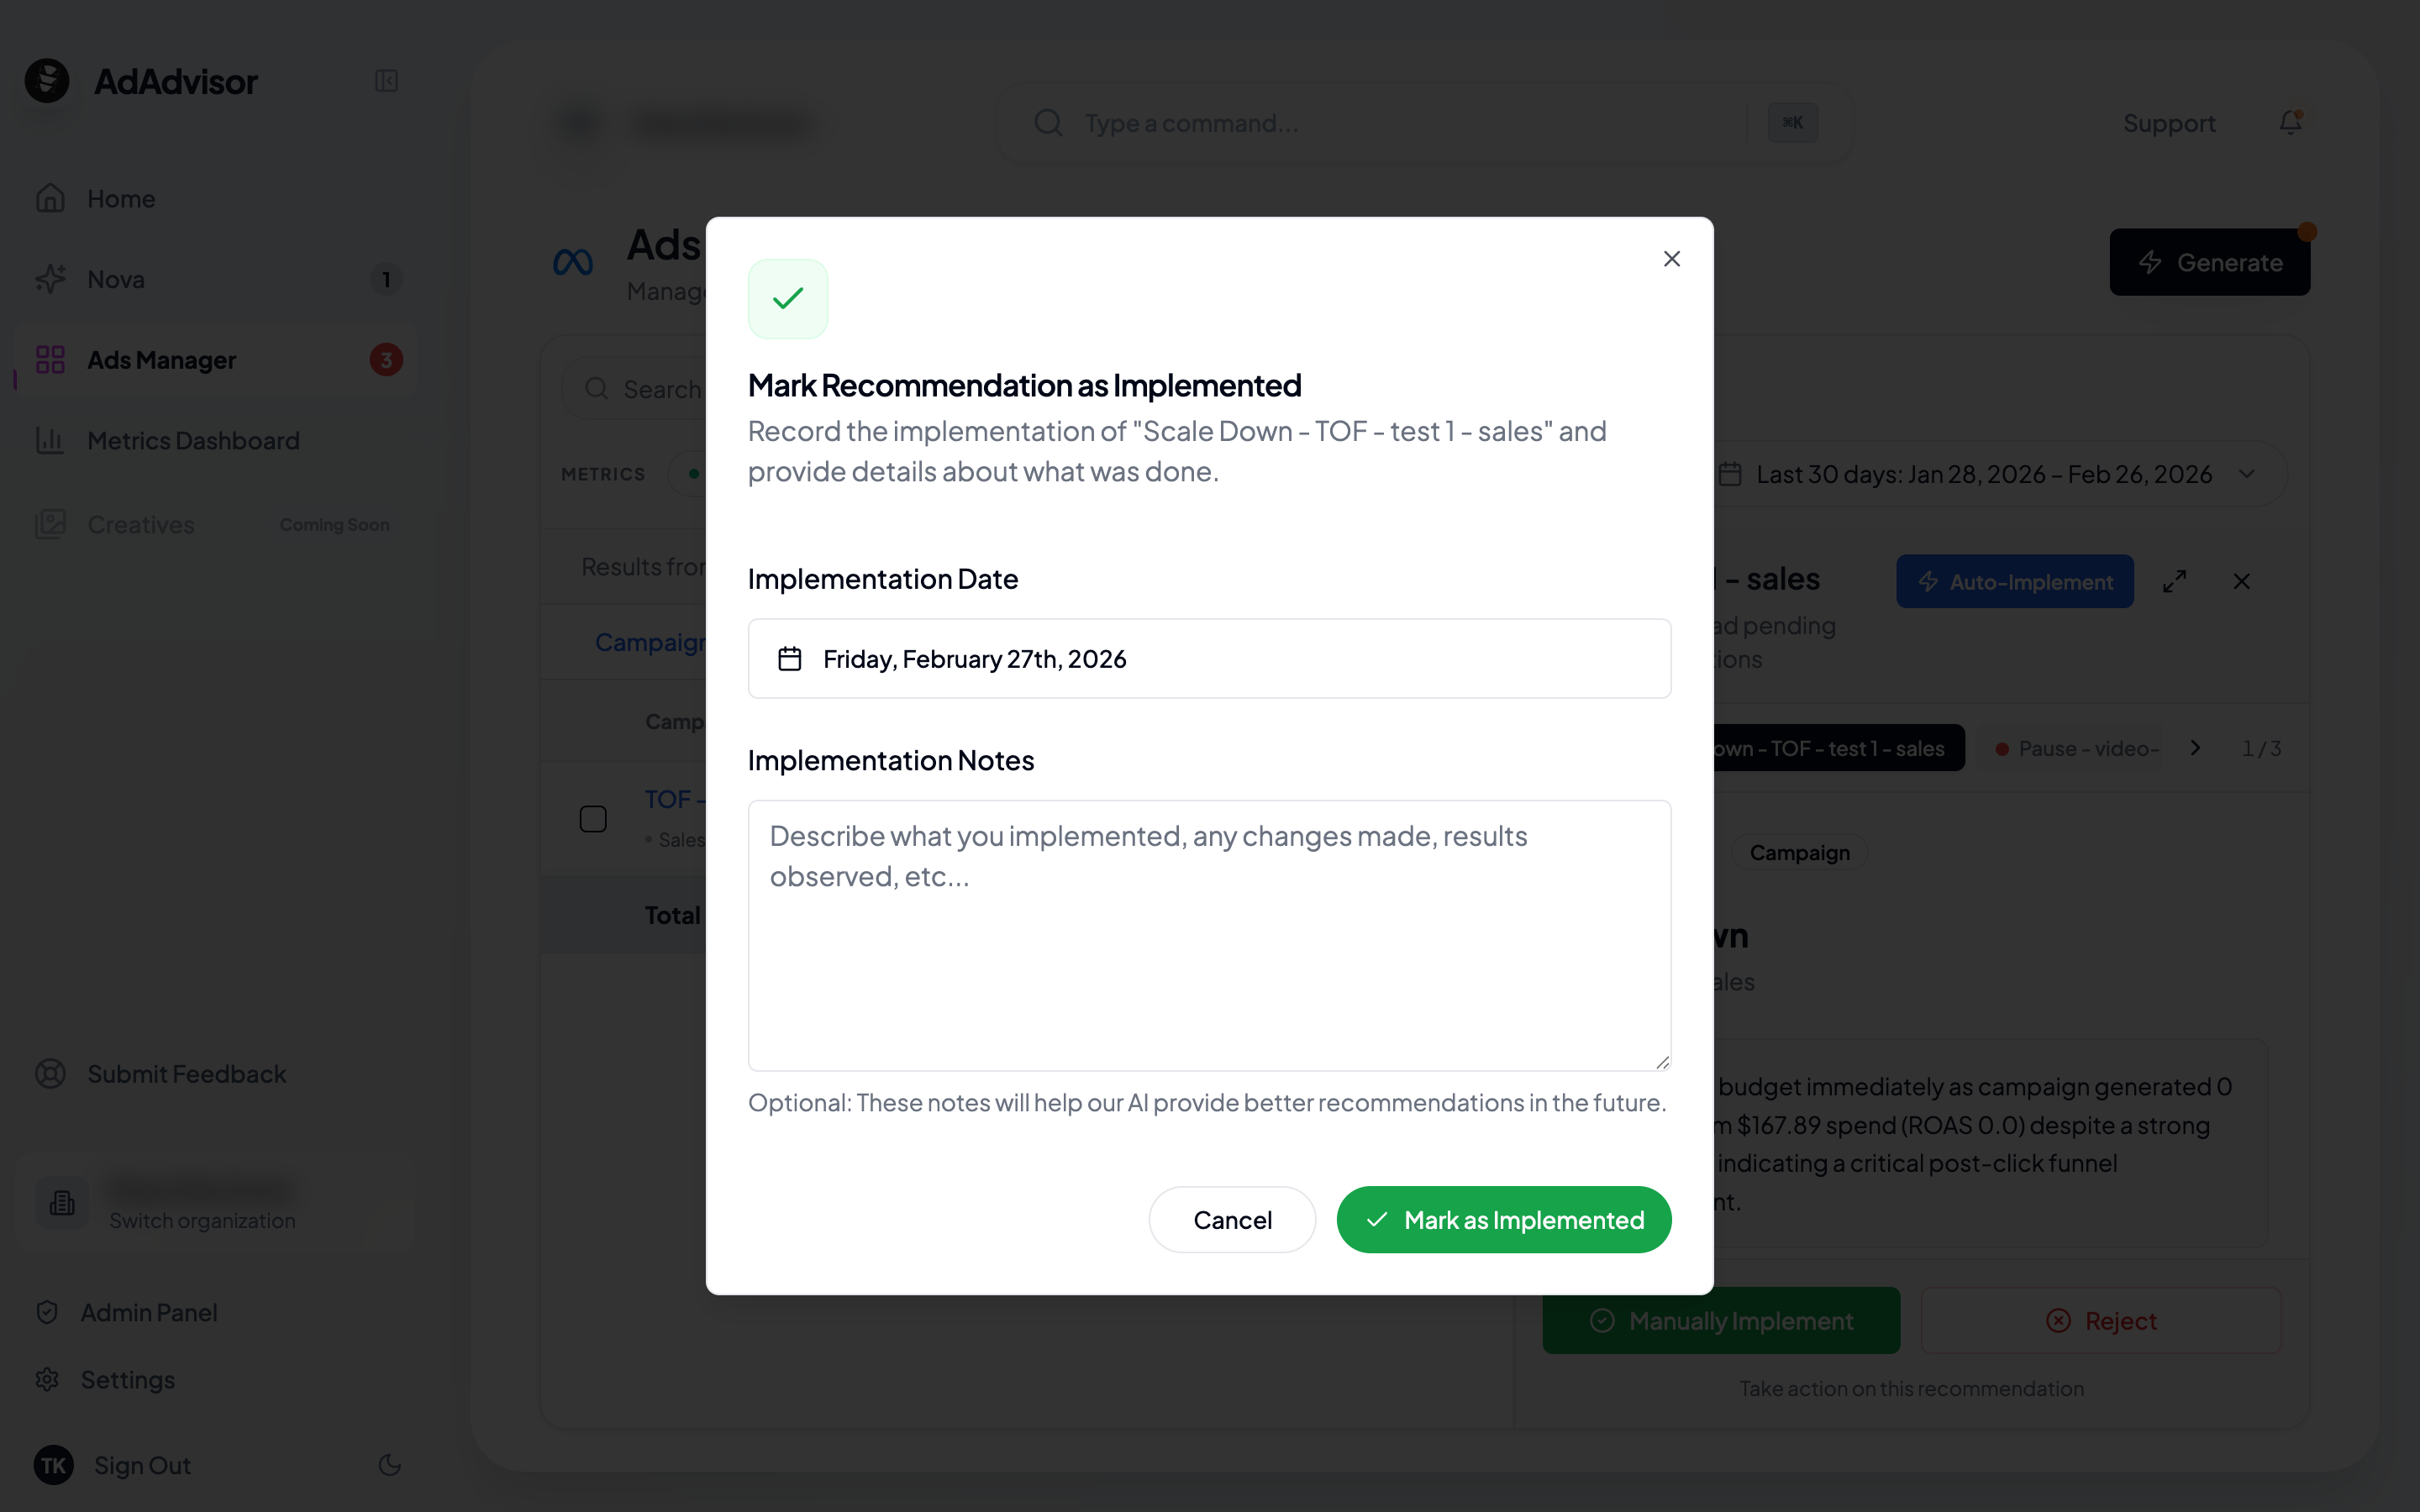
Manual implementation
Use this when you want to make the change yourself in Meta Ads Manager, or when the recommendation type isn’t eligible for auto-implementation.Add notes (optional)
A dialog appears with two fields:
- Implementation notes: Any details about what you changed (optional)
- Implementation date: Defaults to today. Change it if you made the change on a different day.
Recommendations you should implement manually
Some recommendations require creative or strategic work that can’t be automated:- Refresh Creatives: You’ll need to create new ad images or videos and upload them in Meta
- Fix Audience Fatigue: Adjust your targeting parameters in Meta’s ad set settings
- Create Campaign/Ad Set: Build new entities with specific configurations
- Fix Funnel/AOV: These involve changes to your website or landing pages, not just ad settings
Tracking your implementation history
All accepted recommendations are recorded with:- The date and time you implemented them
- Your notes (if you added any)
- Whether it was manual or auto-implemented